Reports can be scheduled to run automatically at a given time/date, or on multiple occasions.
Report Schedules can be configured with particular settings, including recurrence, report parameters, output options and notifications.
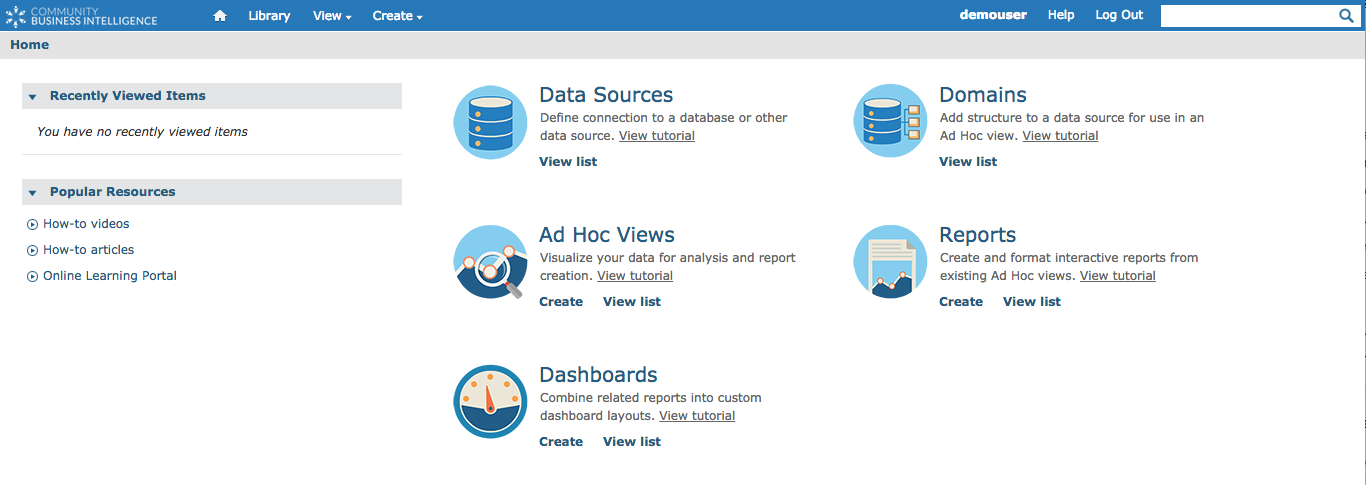
Community BI allows you to create Ad Hoc Views, Reports and Dashboards that can be shared with any users of the system.
Reports are a more formal way of displaying information captured in an Ad Hoc View. Reports allow you to share the information with authorised persons who may not have access to the BI system.
Instructions
Step 1. Log in to your Community BI system (refer to Logging In for further information).
The homepage is displayed
Step 2. Click the View drop-down at the top of the homepage
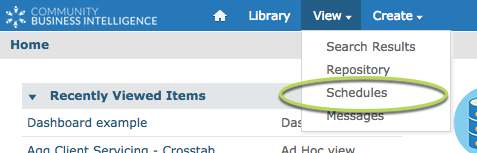
Step 3. Select Schedules from the list
The Schedules page is displayed
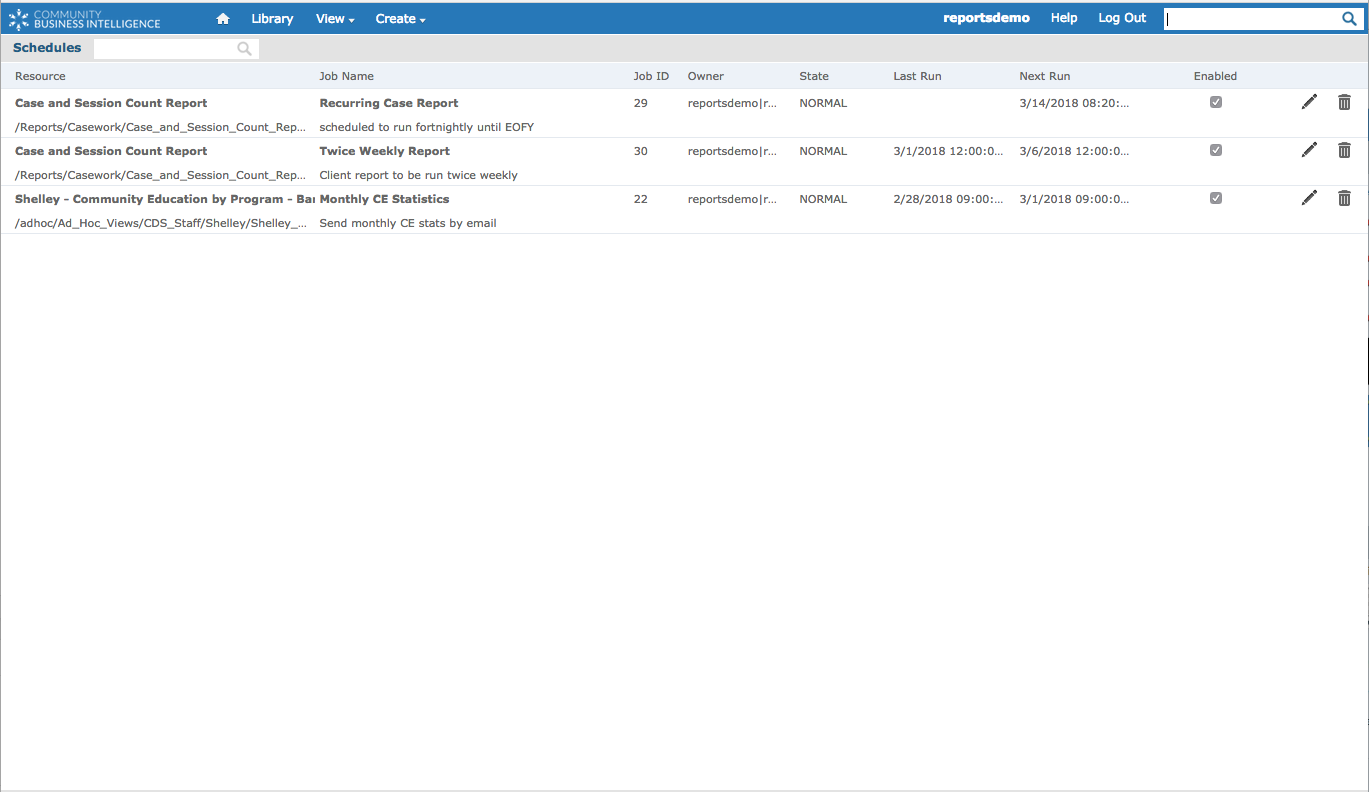
All created schedules are listed with the following information:
- Resource – name of the Report or Dashboard used for the schedule
- Job Name – name given to the schedule
- Job ID – system generated ID
- Owner – owner of the schedule
- State – current state of the schedule
- Last Run – date the schedule was last run
- Next Run – date the schedule is due to run
- Enabled – indicates whether the schedule is currently enabled
Disable/Enable the Schedule
If you wish to stop the schedule running temporarily, you can disable the schedule. It can be re-enabled at any time.
Step 4. Find the schedule you wish to disable

Step 5. Click the checkbox in the Enabled column

- The Enabled checkbox is no longer checked.
- The State is changed to PAUSED
- The Next Run date is set to Disabled.
Step 6. To Re-enable the schedule, click the checkbox in the Enabled column

The schedule is updated

- The Enabled checkbox is checked.
- The State is changed to NORMAL
- The Next Run date is set to the next date.
Edit the Schedule
Step 4. To edit the schedule, click the edit (pencil) icon next to the required schedule.
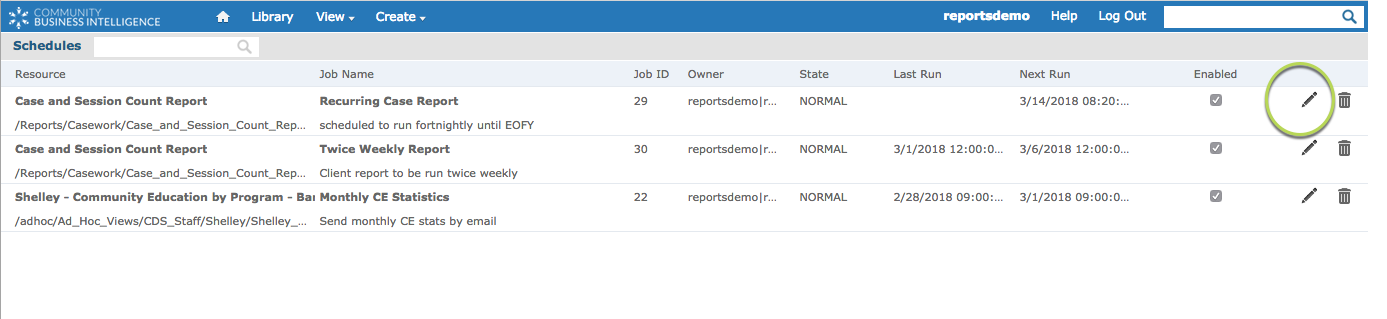
Step 5. Edit the schedule as required
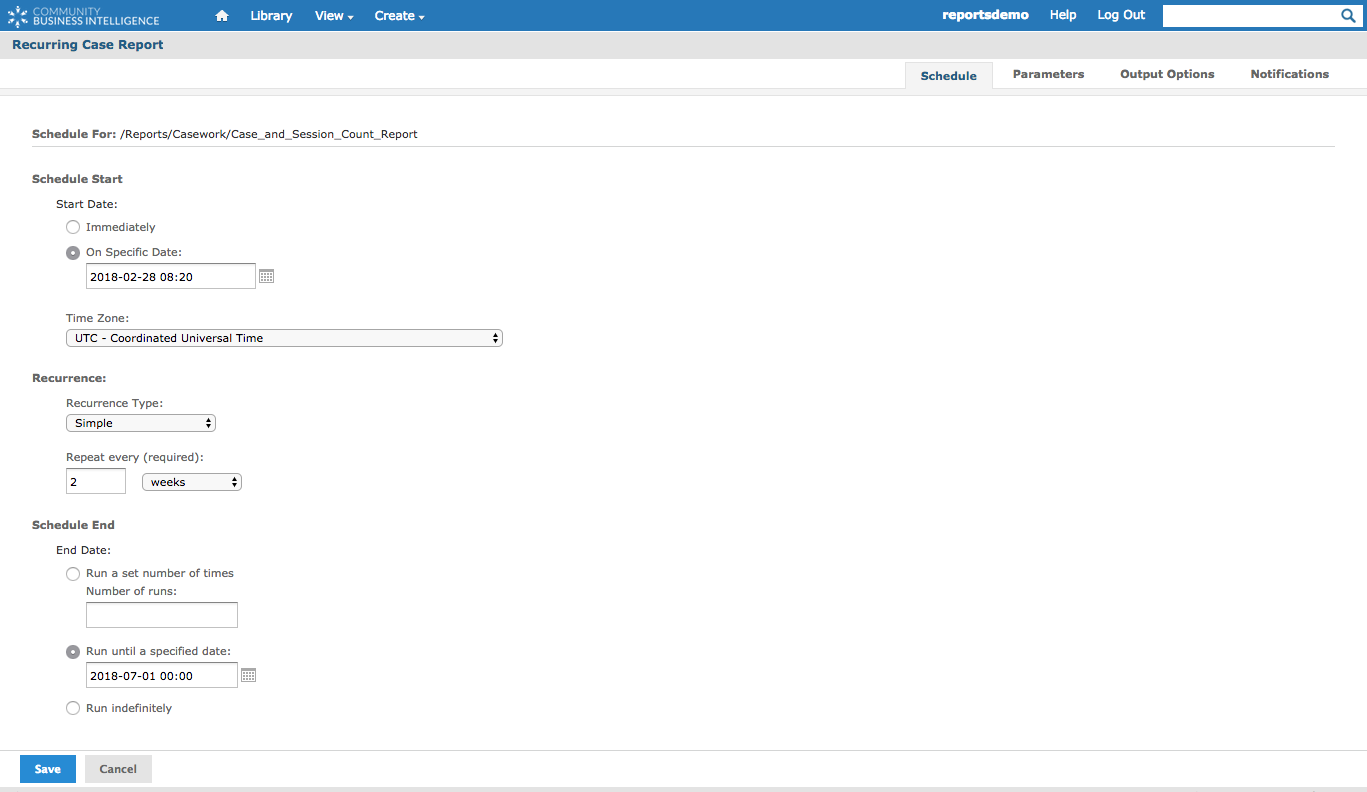
For further information on Editing Schedules, refer to the Scheduling Reports – Report Settings article.
Delete the Schedule
If the schedule is no longer required, you may wish to delete the record.
Step 4. Click the delete (bin) icon

Click 5. Click OK to confirm the deletion
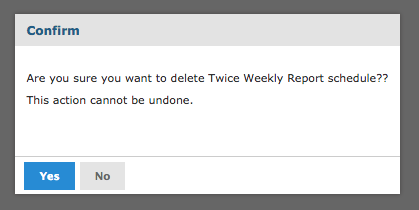
The schedule has been deleted from the list

Further Information
For further information on Scheduling, please refer to the following articles:
- Scheduling Reports – Report Settings
- Scheduling Reports – Once Off Schedule
- Scheduling Reports – Simple Recurring Schedule
- Scheduling Reports – Calendar Recurring Schedule