Ad Hoc Views can be saved for future use, to share with other users, or to edit at a later time.
Ad Hoc Views allow you to visualise and analyse the data you capture for your organisation.
Ad Hoc Views can be viewed in the Community BI system or in reports and dashboard.
Instructions
Step 1. Once your view has been created (refer to the Create an Ad Hoc View article) you may wish to save it.
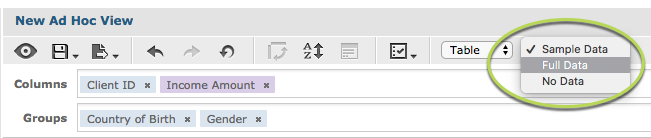
Step 2. If you are happy with the report, you should change from Sample Data to Full Data.
Tip: while editing your ad hoc view will only use sample data to ensure quicker response times.
At the top of the page, click on the Sample Data drop down and select Full Data.
Step 3. Add a title to your view by clicking on the ‘Click to add a title’ field at the top of the screen.
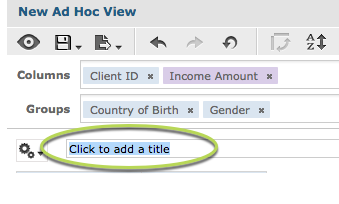
The title now appears at the top of the view.
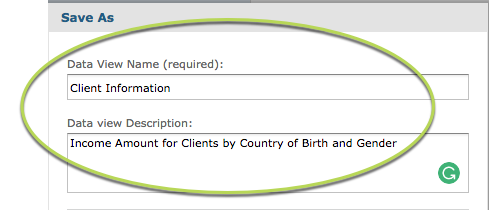
Step 4. To save your view, click on the Save icon and select Save Ad Hoc View As …

Step 5. Enter a Data View Name
Step 6. Enter a Data view Description (if required)
Step 7. Select location to store Ad Hoc View
Tip: Your organisation should agree and advise naming conventions and saving locations
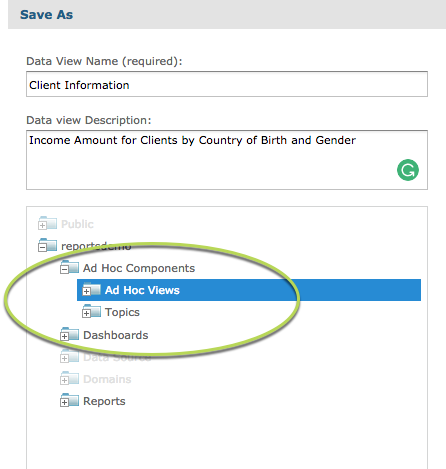
Step 8. Click Save
You may choose to save the Ad Hoc View and create a report from the view at the same time.
For instructions refer to the Ad Hoc View – Saving and Creating a Report article.
Further Information
For further information on Ad Hoc Views, refer to the following articles: