Filters allow you to easily change which records are displayed in an Ad Hoc View, based on selected criteria.
You can choose to exclude or include values on one or multiple fields.
Ad Hoc Views allow you to visualise and analyse the data you capture for your organisation.
Instructions
Step 1. Open or create a new ad hoc view (refer to Creating Ad Hoc Views)
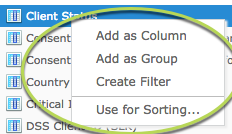
Step 2. Right-click a field to filter on
(e.g. Gender).
Tip: You can right click on the field in the fields pane, in the columns and groups area, or within the view pane.
Field pane
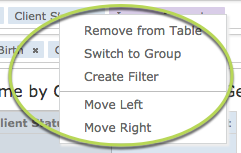
Columns and Groups or Rows
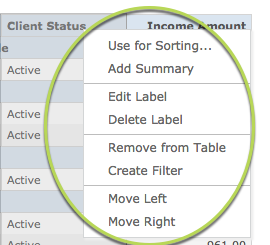
View pane
Step 3. Select Create Filter
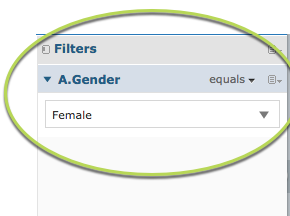
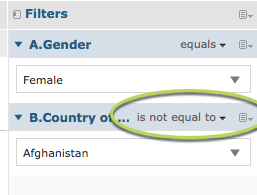
Filter appears in the Filters pane on the right-hand side
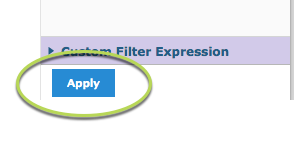
Tip: The filter will not become active until you click the Apply button at the bottom of the Filters pane
Step 4. Click on the equals drop down next to the filter name. Select from the available filter options.
(e.g. equals)
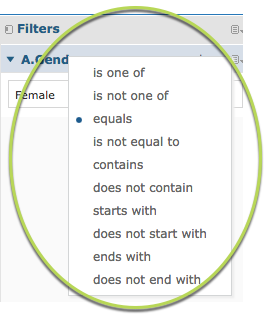
Step 6. Select the required value from the values list
(e.g. Female)

Step 7. Click Apply
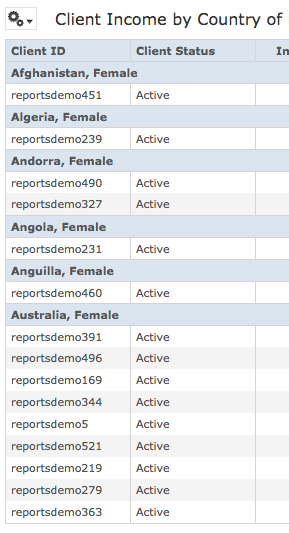
The newly filtered information will appear in the table.
Tip: Some fields cannot be used as filters.
In Crosstabs, you can also create a filter by click on a field entry.
Step 8. Right click on a row entry
Step 9. Select Keep only
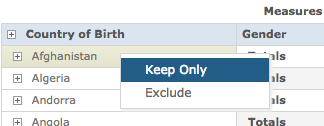
The selected field is created as a filter with only the selected value displayed.
The filter is automatically applied. (You do not need to press apply)
Step 10. To remove the filter, right click on the filter in the Filters pane and select Remove Filter

Step 11. Click Apply at the bottom of the Filters pane for the filter to be removed.
Step 12. To exclude a particular value, right click the field and select Exclude
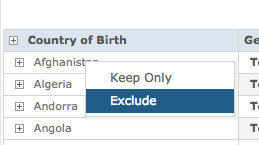
A new filter is added to the Filters pane and the selected field value is excluded
The filter is automatically applied. (You do not need to press apply)
Once the filter is created in the Filters pane you can edit it as described in the earlier steps.
Further Information
For more information, refer to the following articles: